

วิธีการวัดความสว่างของป้ายและจอแสดงผล LED
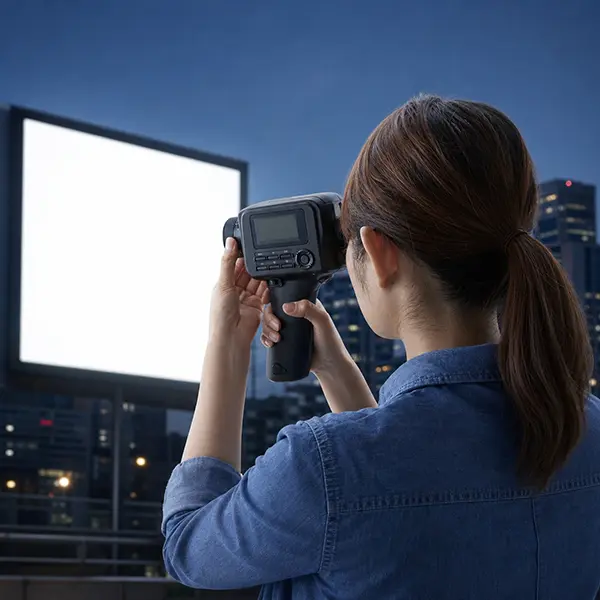
ป้าย LED และจอแสดงผลดิจิทัลถูกนำมาใช้กันอย่างแพร่หลายสำหรับการโฆษณากลางแจ้ง ทั้งบริเวณหน้าร้านค้า อาคาร สถานีขนส่ง รวมถึงจอภาพขนาดใหญ่ ความสว่างที่โดดเด่นทำให้ป้ายเหล่านี้เป็นเครื่องมือสื่อสารที่มีประสิทธิภาพ แต่ความสว่างที่มากเกินไปอาจทำให้รู้สึกไม่สบายตา ก่อให้เกิดมลภาวะทางแสง รบกวนทัศนวิสัยของผู้ใช้ถนน และสร้างความเดือดร้อนให้แก่ผู้อยู่อาศัยในบริเวณใกล้เคียง
การกำหนดระดับความสว่างที่เหมาะสมนั้น ไม่สามารถประเมินได้จากการมองที่จอแสดงผลเพียงอย่างเดียว เนื่องจากผลลัพธ์อาจแปรผันตามขนาดของป้าย ความสูงในการติดตั้ง ระยะการมองเห็น ระยะเวลาการใช้งาน เนื้อหาที่แสดง และสภาพแสงโดยรอบ โครงการต่าง ๆ อาจต้องปฏิบัติตามข้อกำหนดของลูกค้า แนวทางปฏิบัติของอุตสาหกรรม หรือข้อบังคับท้องถิ่น ตัวอย่างเช่น กรุงเทพมหานครได้กำหนดขีดจำกัดความสว่างในเวลากลางคืนสำหรับป้ายไฟฟ้าแบบส่องสว่างด้วยตัวเองตั้งแต่เวลา 18:30 น. ถึง 06:00 น. ไว้ที่ 400 cd/m²
“ดังนั้น การวัดค่าอย่างเป็นรูปธรรมจึงมีความสำคัญอย่างยิ่งในการยืนยันว่าป้าย LED ทำงานได้ในระดับที่ต้องการหรือไม่ ซึ่งขึ้นอยู่กับข้อกำหนดที่เกี่ยวข้อง การประเมินอาจรวมถึงการวัดความสว่างที่จอแสดงผล ความสว่าง ณ จุดสังเกตที่กำหนด หรือทั้งสองอย่าง และโครงการบางโครงการอาจต้องการการวัดค่าสีของแสงที่เปล่งออกมาด้วย”
ปัญหา: ความสว่างของป้าย LED ไม่ใช่การวัดแบบเดียว
คำว่า “ความสว่าง” มักถูกใช้เป็นคำอธิบายโดยทั่วไป แต่การประเมินป้าย LED นั้นเกี่ยวข้องกับปริมาณทางแสง (Photometric quantities) ที่เฉพาะเจาะจงกว่านั้น ค่าความสว่าง ซึ่งแสดงในหน่วยแคนเดลาต่อตารางเมตร (cd/m²) นั้นเกี่ยวข้องกับปริมาณทางแสง ปริมาณทางโฟโตเมตริกที่เฉพาะเจาะจงกว่านั้น ความสว่าง ซึ่งแสดงในหน่วยแคนเดลาต่อตารางเมตร หรือ cd/m² จะอธิบายถึงแสงที่เปล่งออกมาหรือสะท้อนจากพื้นผิวป้ายในทิศทางใดทิศทางหนึ่ง ถือเป็นค่าที่สามารถวัดได้อย่างเป็นรูปธรรม และเกี่ยวข้องโดยตรงกับความสว่างของป้ายที่ปรากฏต่อสายตาจากทิศทางการมองนั้น ๆ
ค่าความส่องสว่างหรือที่วัดเป็นหน่วยลักซ์ เป็นตัวชี้วัดปริมาณแสงที่ตกกระทบลงบนพื้นผิวหรือจุดที่กำหนดไว้ โดยสามารถนำมาใช้ประเมินว่า แสงจากป้าย LED ส่องไปถึงขอบเขตที่ดิน ถนน อาคารใกล้เคียง หรือสถานที่อื่น ๆ ที่ระบุไว้มากน้อยเพียงใด
แม้ความสว่างและความส่องสว่างจะมีความสัมพันธ์กัน แต่ก็ไม่สามารถใช้แทนกันได้ ทั้งนี้ การเลือกวัดปริมาณที่ถูกต้อง รวมถึงการกำหนดเครื่องมือ ตำแหน่งการวัด และวิธีการทดสอบนั้น จะขึ้นอยู่กับข้อบังคับที่เกี่ยวข้อง ข้อกำหนดของโครงการ หรือขั้นตอนการประเมิน
สภาพแวดล้อมโดยรอบมีผลต่อการรับรู้ป้าย LED ด้วยเช่นกัน จอแสดงผลที่ดูเหมาะสมในเวลากลางวัน อาจดูสว่างเกินไปหลังจากพระอาทิตย์ตกดิน เนื่องจากสภาพแวดล้อมโดยรอบมืดลง ปัจจัยต่าง ๆ เช่น สภาพอากาศ แสงไฟใกล้เคียง พื้นผิวสะท้อนแสง และการเปลี่ยนแปลงการตั้งค่าความสว่างของจอแสดงผล อาจส่งผลต่อความสว่างที่รับรู้ได้ และอาจส่งผลต่อค่าที่วัดได้จริง ขึ้นอยู่กับวิธีการวัด
เนื้อหาแบบไดนามิกได้สร้างความท้าทายเพิ่มเติม วิดีโอ ภาพเคลื่อนไหว และโฆษณาที่เปลี่ยนแปลงไป อาจทำให้ผลลัพธ์ที่วัดได้เปลี่ยนแปลงอย่างรวดเร็ว
การวัดค่าเพียงครั้งเดียวในฉากที่มืดอาจไม่ได้แสดงถึงความสว่างสูงสุดหรือความสว่างปกติของจอแสดงผล
นอกจากนี้ เรขาคณิตของการวัด ก็มีความสำคัญไม่แพ้กัน หากเครื่องมือวัดไม่มั่นคง เล็งเป้าผิด หรือพื้นที่การวัดขยายออกไปนอกหน้าจอ LED ค่าที่ได้อาจรวมเอาพื้นหลังโดยรอบเข้าไปด้วย ดังนั้น การกำหนดสภาวะการวัดที่สามารถควบคุมได้ พร้อมทั้งมีการบันทึกรายละเอียดอย่างครบถ้วน จึงเป็นสิ่งจำเป็นอย่างยิ่ง เพื่อให้ได้ผลลัพธ์การวัดที่แม่นยำ น่าเชื่อถือ และสามารถทำการวัดซ้ำได้
การวัดป้าย LED ด้วยเครื่องมือวัด Konica Minolta Sensing
การประเมินผลป้าย LED ให้มีความน่าเชื่อถือ จำเป็นต้องเริ่มต้นจากการรวบรวมข้อมูลพื้นฐานที่เกี่ยวกับการติดตั้ง ได้แก่ ขนาดของป้าย ความสูงในการติดตั้ง ประเภทของเนื้อหา ช่วงเวลาการใช้งาน การตั้งค่าความสว่าง ระยะห่างในการวัด ทิศทางการมองเห็น สภาพแวดล้อมโดยรอบ ตลอดจนเกณฑ์มาตรฐานความสว่างที่เกี่ยวข้อง
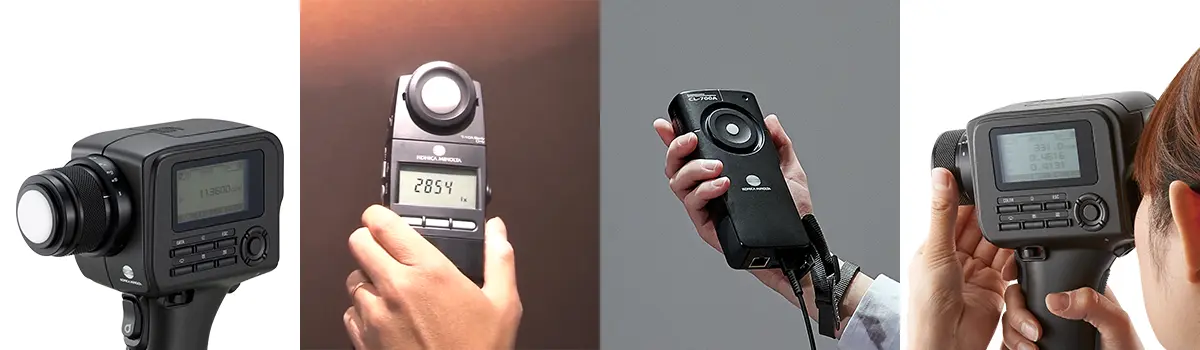
จากซ้ายไปขวา: เครื่องวัดความสว่าง LS-150/160, เครื่องวัดความส่องสว่าง T-10A, เครื่องวัดสเปกตรัมความส่องสว่าง CL-700A และเครื่องวัดความสว่างและสี CS-150/160
สำหรับการวัดค่าความส่องสว่าง โดยตรงในหน่วย cd/m² เครื่องวัดความส่องสว่าง Konica Minolta รุ่น LS-150 และ LS-160 สามารถวัดแบบจุดโดยไม่ต้องสัมผัสได้ ช่องมองภาพแบบออปติคัลช่วยให้ผู้ปฏิบัติงานระบุพื้นที่เฉพาะของจอแสดงผลที่ต้องการวัดได้ LS-150 มีมุมวัด 1° ขณะที่ LS-160 มีมุมวัดที่แคบกว่า คือ 1/3° มุมวัดที่แคบกว่าช่วยให้ LS-160 สามารถวัดพื้นที่เป้าหมายที่มีขนาดเล็กกว่าได้จากระยะทางเท่ากัน ซึ่งเป็นประโยชน์เมื่อต้องประเมินป้ายที่ติดตั้งอยู่ไกลจากตำแหน่งวัดมากขึ้น
ในขั้นตอนการวัด ควรติดตั้งเครื่องมือบนขาตั้งกล้องที่มั่นคงและเล็งไปยังบริเวณที่ต้องการประเมินบนจอแสดงผล โดยทั่วไปควรตั้งแนวการวัดให้ตั้งฉากกับพื้นผิวป้าย ยกเว้นกรณีที่ขั้นตอนการประเมินระบุทิศทางการมองไว้เป็นอย่างอื่น นอกจากนี้ ต้องตรวจสอบให้แน่ใจว่ากรอบพื้นที่การวัด ของเครื่องมืออยู่ภายในขอบเขตของหน้าจอ LED อย่างสมบูรณ์
สำหรับป้ายที่แสดงภาพนิ่ง ควรทำการวัดในหลายตำแหน่งเพื่อตรวจสอบความสม่ำเสมอและความแปรผันของความสว่างที่อาจเกิดขึ้นทั่วทั้งหน้าจอ ทั้งนี้ รูปแบบการรายงานผลลัพธ์อาจนำเสนอเป็นค่าของแต่ละจุด เป็นช่วงของค่าการวัด หรือเป็นค่าเฉลี่ยจากหลายจุด ซึ่งจะขึ้นอยู่กับข้อกำหนดของแต่ละโครงการ
สำหรับการตรวจสอบค่าความสว่างสูงสุด ควรใช้ภาพทดสอบสีขาวล้วนแบบสม่ำเสมอ ที่ระดับความสว่างตามที่ระบุไว้ในขั้นตอนการประเมิน ทำการวัดค่าซ้ำหลายครั้ง พร้อมทั้งจดบันทึกรายละเอียดที่เกี่ยวข้อง ได้แก่ เนื้อหาที่แสดงบนจอ ระดับการตั้งค่าความสว่าง ระยะห่าง มุมในการวัด เวลา สภาพอากาศ และสภาพแสงโดยรอบ
ในกรณีที่ต้องประเมินความสว่างขณะจอแสดงเนื้อหาตามปกติ ควรเก็บข้อมูลการวัดซ้ำอย่างต่อเนื่องในช่วงเวลาที่เหมาะสมเพื่อบันทึกความแปรผันของผลลัพธ์ ทั้งนี้ ต้องแยกบันทึกผลลัพธ์ส่วนนี้ออกจากผลการวัดด้วยภาพทดสอบสีขาวอย่างชัดเจน เนื่องจากเนื้อหาที่มีการเคลื่อนไหวหรือมีสีสัน อาจไม่สามารถสะท้อนถึงค่าความสว่างสูงสุดที่แท้จริงของจอแสดงผลได้
เมื่อเกณฑ์ที่ใช้พิจารณาอิงตามปริมาณแสงที่ส่องถึงตำแหน่งใดตำแหน่งหนึ่งเครื่องวัดความสว่าง Konica Minolta รุ่น T-10Aสามารถใช้ในการวัดความสว่างในหน่วยลักซ์ได้ และควรวางตำแหน่งและกำหนดทิศทางของตัวรับสัญญาณให้สอดคล้องกับวิธีการประเมินที่ต้องการ ซึ่งอาจเกี่ยวข้องกับการวัดที่ระยะห่างที่กำหนดจากป้าย ที่ขอบเขตที่ดิน ใกล้กับอาคารที่อาจได้รับผลกระทบ หรือที่จุดสังเกตอื่น ๆ ที่กำหนดไว้
หากจำเป็น ให้เปรียบเทียบค่าที่วัดได้กับความสว่างของสภาพแวดล้อมโดยรอบ และควรวัดค่าความสว่างพื้นฐานของสภาพแวดล้อมโดยใช้วิธีการที่ระบุไว้ในแนวทางที่เกี่ยวข้อง เช่น การบังแสงของป้ายชั่วคราว หรือการบันทึกสภาพเมื่อปิดจอแสดงผล
บางโครงการต้องการข้อมูลมากกว่าแค่ค่าความสว่างหรือความส่องสว่าง อาจจำเป็นต้องประเมินคุณลักษณะด้านสีของป้าย LED โดยใช้พารามิเตอร์อื่นๆ เช่นอุณหภูมิสีที่สัมพันธ์กันหรือพิกัดสี CIE x,y.
เครื่องสเปกโตรโฟโตมิเตอร์วัดความส่องสว่าง Konica Minolta รุ่น CL-700A สามารถวัดค่าความส่องสว่าง พร้อมข้อมูลด้านสเปกตรัมและสี ณ จุดวัดได้ โดยให้ข้อมูลพิกัดสี อุณหภูมิสีสัมพันธ์ การกระจายสเปกตรัม และข้อมูลอื่น ๆ ที่เกี่ยวข้องกับสี
สำหรับการวัดค่าความส่องสว่าง และสีจากจอแสดงผลโดยตรงแบบไม่สัมผัส เครื่องวัดความส่องสว่างและสี Konica Minolta รุ่น CS-150 และ CS-160 สามารถวัดค่า luminance และ chromaticity ภายในพื้นที่เป้าหมายที่เลือกได้ เครื่องมือเหล่านี้เหมาะสำหรับกรณีที่ต้องประเมินคุณลักษณะด้านความสว่างและสีของป้าย LED จากระยะไกล
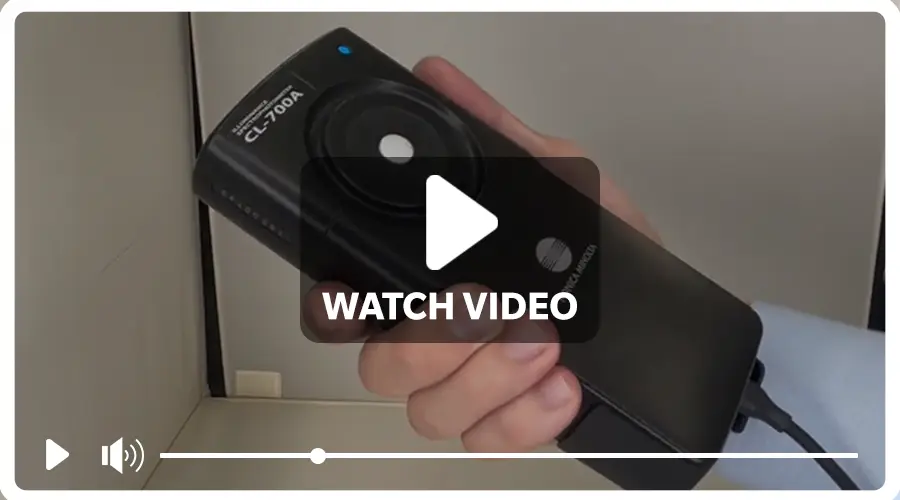
รับชมวิดีโอ
วิดีโอแสดงการวัดค่าความสว่างด้วยสเปกโทรโฟโตมิเตอร์ รุ่น CL-700A
เมื่อเสร็จสิ้นขั้นตอนการวัด ให้ทำการสรุปข้อมูลค่าความสว่าง (Luminance) ค่าความส่องสว่าง (Illuminance) และค่าสี เพื่อนำผลลัพธ์ไปเปรียบเทียบกับเกณฑ์มาตรฐานที่กำหนดไว้ หากพบว่าป้ายมีค่าความสว่างเกินกว่าระดับที่อนุญาต ควรปรับลดความสว่างผ่านทางซอฟต์แวร์ควบคุมการแสดงผล และดำเนินการประเมินซ้ำอีกครั้ง
นอกจากนี้ การเปิดใช้ระบบหรี่แสงอัตโนมัติ หรือการติดตั้งเซนเซอร์ตรวจจับแสงโดยรอบ ยังเป็นอีกหนึ่งแนวทางที่ช่วยปรับระดับความสว่างของหน้าจอให้เหมาะสมกับสภาพแวดล้อมในช่วงเวลากลางวันและกลางคืนได้อย่างมีประสิทธิภาพ
เหตุที่ควรเลือกเครื่องมือตรวจวัดของ Konica Minolta?
Konica Minolta Sensing Instruments ทำให้การวัดค่าความสว่าง ความส่องสว่าง และสีของป้าย LED ที่แม่นยำ เชื่อถือได้ และทำการวัดซ้ำได้ โซลูชันการวัดที่เชื่อถือได้ของเราช่วยให้ผู้เชี่ยวชาญตรวจสอบประสิทธิภาพด้านความสว่างและสี ให้ค่าสีที่มีความสม่ำเสมอ เพื่อให้ป้ายแสดงผลทำงานได้สอดคล้องกับกฎระเบียบที่กำหนด พร้อมทั้งรักษาระดับทัศนวิสัยที่ชัดเจนและเป็นมิตรต่อสายตาอย่างสูงสุด
หากต้องการความช่วยเหลือในการเลือกอุปกรณ์ที่เหมาะสมสำหรับงานป้าย LED สามารถติดต่อ Konica Minolta Sensingเพื่อขอคำแนะนำจากผู้เชี่ยวชาญเกี่ยวกับวิธีการวัดที่เหมาะสมที่สุด