Measuring Surface Finishes

A product’s appearance plays a crucial role in shaping customers’ perceptions of its quality and value, ultimately influencing their purchasing decision. From automotive bodies to refrigerator doors, the surface finish applied to the product is often the first thing customers notice. Therefore, understanding and optimizing the surface finish of a product is of great importance. A high-quality surface finish should be smooth and free of defects like orange peel.
Orange Peel in Finishes
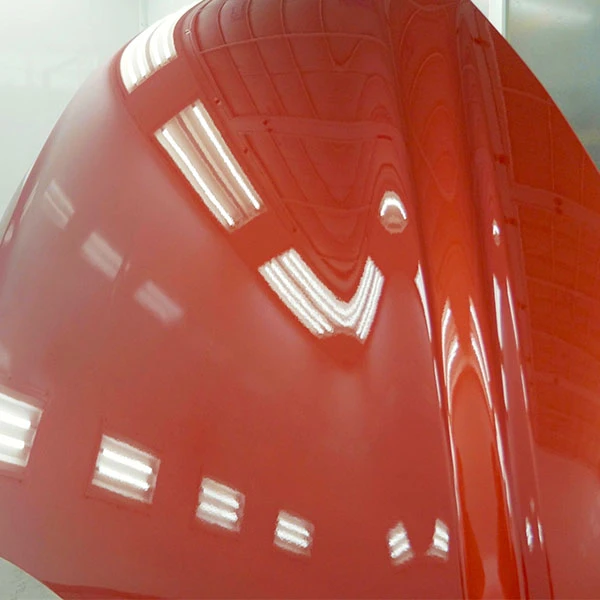
Orange peel is a type of defect named after its resemblance to the texture of an orange peel, with a bumpy, uneven surface. Detecting the existence of orange peel and reducing it is of utmost importance. One of the common approaches to evaluating orange peel in finishes is to examine the clarity of the reflected image on the finished surface. The higher the amount of orange peel, the less defined the reflected image, and the rougher and more uneven the finished surface. Traditionally, the reflected image clarity is evaluated visually by examining the reflection of the fluorescent lamp on the surface. This method is highly subjective as it relies on the perception and interpretation of the individual performing the evaluation. Different evaluators can potentially derive different conclusions based on their own experiences, training, or personal preferences.
Measurement instruments are recommended as they provide a more objective and consistent evaluation of the reflected image clarity. While there are various types of measurement instruments, some of them may have a few downsides. For example, measurement instruments that irradiate laser point light source on the surface and measures the reflected light intensity can determine the waviness of the surface. However, this method focuses on the surface and does not correlate well with visual evaluation since our eyes are more focused on the reflected image during observation.
Aside from poor application technique or incorrect drying of paint or coating, orange peel can also be caused by the surface condition of the base material. So to better improve the final finish quality, it’s imperative to begin evaluation starting from the base materials. However, since most base materials (e.g., steel, aluminum, etc.) has low luster and does not form reflected image on their surface, an additional measurement instrument like a white light interferometer is needed to evaluate the surface condition.
Total Appearance Measurement System (TAMSTM)
The Rhopoint TAMSTM is an advanced appearance measurement instrument that measures reflected image clarity (orange peel) with good visual correlation while also capable of quantifying the surface roughness condition of the base material.
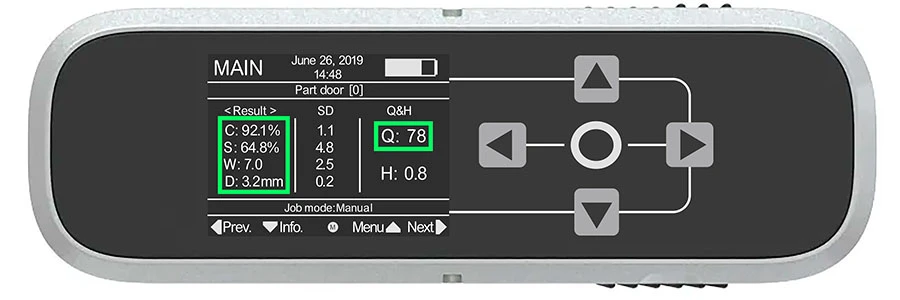
The Rhopoint TAMSTM utilizes four parameters – contrast, sharpness, waviness, and dimension – to define the interpretation of a surface finish by our eyes. Contrast, sharpness, and waviness mainly focus on the reflected image, while the dimension parameter describes the dominant wavelength of the surface waviness.
While these parameters can be used individually for evaluation, they can be combined to form single-value indexes that provide quick and uncomplicated surface finish quality evaluation. For example, the contrast, sharpness, and waviness parameters can be combined to form the Quality index that summarizes the overall appearance of a surface. A quality index value of 100% would indicate a surface with a smooth finish and good image-forming characteristics.


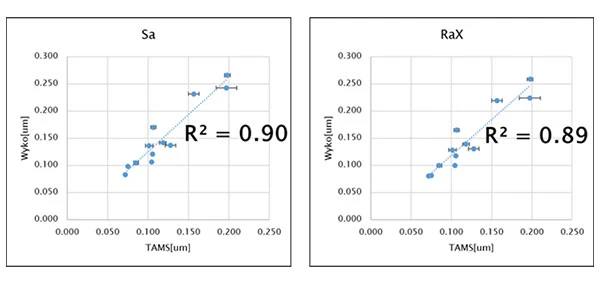
The Rhopoint TAMS shows a high correlation with a white light interferometer with a value of about R2=0.9 for both the Sa and Ra measurements.
Check out this whitepaper to learn more about the capabilities of Rhopoint TAMS.
Need help finding the right measurement instruments to evaluate and analyze your surface finishing or product appearance? Contact our specialists now for a free consultation.
