Automotive Coatings

Qualifying a car is a tedious process as parts are usually supplied through a pool of vendors and each of them has their own color formulation and suppliers. When the parts arrive, they go through incoming inspection.
During the inspection, color difference may not be visually noticeable, but becomes obvious when all parts are assembled. A mismatch in color can affect the product image and market appeal, it also generate unnecessary costs as the rectification process is costly in a highly automated production line. While visual inspection is necessary, however with demands on exact color matching for all the parts, it may not meet the quality control standards.
Engineers shy away from visual color inspection and shift towards a numerical values system to ensure consistency in shade. In a numerical color inspection system, a spectrophotometer is used to provide engineers with color values to control color.
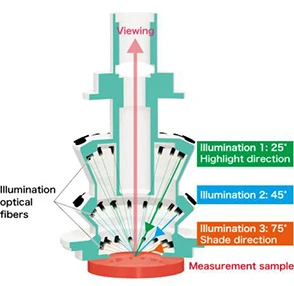
A multi-angle spectrophotometer like the Konica Minolta CM-512m3A, can measure metallic coating from 3 different angles simultaneously. This is helpful for engineers to evaluate the color attributes of metallic coating as they appear differently when viewed from different angles.
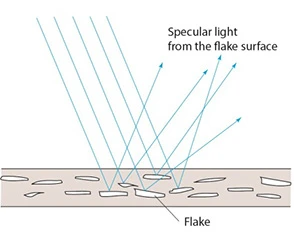
The reason behind this is due to the formulation of metallic flakes in the coating which causes light to reflect in different direction hence a multi-angle spectrophotometer is the recommended instrument for analyzing metallic or pearl coating of a vehicle.


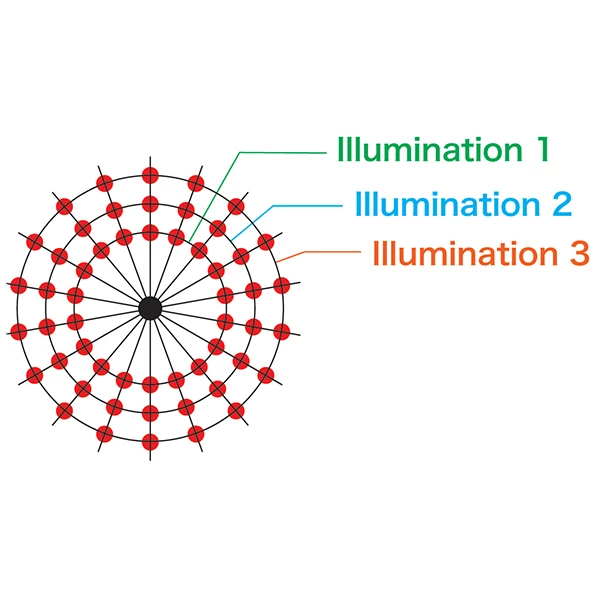
The CM-512m3A uses a circumferential illumination system which illuminates object surfaces using a ring of optical fibers at each of the 3 different angles. This reduces the influence of instrument orientation and is ideal for measuring curved surfaces like car bodies or bumpers, resulting in a more stable result.
The CM-512m3A is placed on the surface of the vehicle or the test panel, with readings taken at 25, 45 and 75 degrees. Each of these angles is read for several colorimetric variables such as lightness/darkness, hue and chroma.
Color difference data can also be read as most systems compare the vehicle against the test panel. Readings and visual cues such as pass/fail judgment and graphs are also displayed for technicians to easily make judgments on the color differences in all 3 different angles.
Check out our advance imaging solutions for automotive industry to find out more on automotive color testing and measurement solutions.
For more information on CM-512m3A or any other measuring instruments related to the automotive industry, please click here. Alternatively, you can also contact us at +65 6895 8685 or write to us at ssg@gcp.konicaminolta.com.
