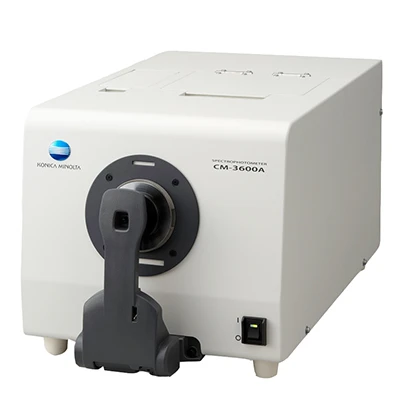
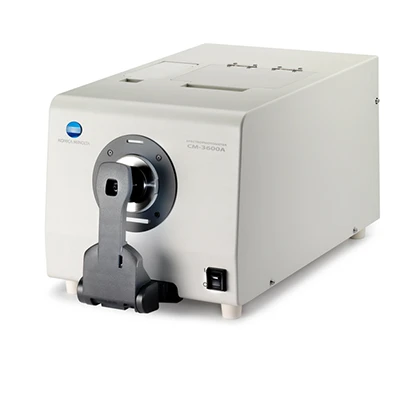
Spectrophotometer CM-3600A
Konica Minolta designed the CM-3600A spectrophotometer with high-precision capabilities and great reliability. Its versatility and ease of use makes it a good choice in many measuring applications. Because it’s so easy to operate, it’s consistently among the most sought after benchtop spectrophotometers on the market.
The CM-3600A spectrophotometer is a compact yet advanced instrument that features a side port in horizontal format and was built to measure a wide variety of objects’ reflectance. It also measures the transmittance of translucent or transparent liquids and solids – all this while taking up a minimum amount of space.

Spectrophotometer CM-3600A
Numerical Gloss Control Provides Simultaneous SCI/SCE Measurements
The CM-3600A utilizes Konica Minolta’s patented Numerical Gloss Control system, eliminating the need for a mechanical gloss trap. By firing two xenon lamps in quick succession, the system can provide virtually simultaneous SCI (specular component included)/SCE (specular component excluded) measurements and also enable the calculation of 8° gloss.
Numerical UV Control for Accurate Measurements of Fluorescent Materials
Accurate measurement of materials such as paper or cloth treated with fluorescent whitening agents (FWA) requires precise control of the UV component and its effects. The patented Numerical UV Control method used by the CM-3600A can provide such control by using proprietary calculations to combine the results from flashes of two xenon lamps: one with full UV energy, the other with UV energy removed by a UV-cutoff filter (either 400 nm or 420 nm). This method eliminates the need for mechanical filter positioning and repeated filter position adjustment, and enables UV adjustment by Whiteness Index, Tint, Brightness, or UV profile.
Reflectance and Transmittance in One Instrument
The CM-3600A can measure both the reflectance of opaque objects and the transmittance of transparent or translucent solid materials such as plastics. (With accessories, the CM-3600A can even measure the transmittance of liquids.)
For reflectance measurements, the CM-3600A employ di:8°, de:8° (diffuse illumination, 8° viewing) geometry which conforms to ISO, CIE, ASTM, DIN, and JIS standards. For transmittance measurements, the CM-3600A employ d:0° (diffuse illumination, 0° viewing) geometry which conforms to ISO, CIE, ASTM, and DIN standards.
Bright, Clear Sample Viewer for Accurate Sample Positioning
Opening the sample viewer provides a clear, illuminated view of the sample at the measurement port. On the CM-3600A, this view is reflected in a mirror on the sample viewer cover so that you can view it easily even while seated.
Three Measurement Areas For Diverse Needs
Masks for the CM-3600A’s three measurement areas (SAV: Ø4 mm, MAV: Ø8 mm, and LAV: Ø25.4 mm) are included as standard accessories, so you can select the one that fits your measurement requirements.
Full Data Compatibility with CM-3600d and CM-3610d
Since the CM-3600A utilize the same design and innovative technology as their predecessors CM-3600d and full data compatibility is assured.
USB Data Communication
Data communication between the CM-3600A is performed via USB to offer higher speed.
RoHS Compliance
The CM-3600A is in full conformance with the RoHS (Restrictions on Hazardous Substances Directive) to ensure that they are environmentally friendly.
Small footprint
Despite having a 152-mm integrating sphere and being packed full of advanced functionality, the CM-3600A is extremely compact, with a footprint about the same as a sheet of B4 paper or an average laptop computer. It can fit easily in a limited space while still providing the versatility and high accuracy of larger models.
Measures both reflectance and transmittance, including transmittance of liquids
Reflectance
The CM-3600A can measure reflectance using di:8°, de:8° (diffuse illumination, 8° viewing) geometry which conforms to ISO, CIE, ASTM, DIN, and JIS standards
Transmittance
The CM-3600a can measure the transmittance of both solid and liquid materials using d:0° (diffuse illumination, 0° viewing) geometry which conforms to ISO, CIE, ASTM, and DIN standards
Improved sample holder
The sample holder opens approximately 90° for easy positioning of samples. It also has a new “soft-close” mechanism that prevents it from slamming shut and damaging samples or pinching fingers.
Bright, clear sample viewer can be used even while seated.
The sample viewer lets the sample be seen clearly at the measuring port for accurate positioning. When the sample viewer cover is opened, a high-brightness LED illuminates the sample to provide a clear image, and the cover is equipped with a mirror so that the image can be seen even from a seated position.
Spectrophotometer CM-3600A
| Model | CM-3600A |
|---|
| Illumination / observation system | Reflectance; di:8°, de:8° (diffused illumination, 8-degree viewing), equipped with simultaneous measurement of SCI (specular component included) / SCE (specular component excluded); Conforms to CIE No.15, lSO7724/1, ASTM E-1164, DIN 5033 Teil7 and JIS Z8722 condition C standard.
Transmittance : di:0°, de:0° (diffused illumination, 0-degree viewing); Conforms to CIE No.15, ASTM E-1164 and DIN 5033 Teil7 standard. |
| Light-receiving element | Silicon photodiode array (dual 40 elements) |
| Spectral separation device | Diffraction grating |
| Wavelength range | 360nm to 740nm |
| Wavelength pitch | 10 nm |
| Half bandwidth | Approx. 10nm |
| Reflectance range | 0 to 175%, resolution: 0.01% |
| Sphere size | Ø152 mm |
| Light source | 2 pulsed xenon lamps |
| Minimum interval between measurements | Normal SCI/ SCE measurement: 4 sec. UV-cut / UV-adjusted measurement: 5 sec. Transmittance measurement: 3 sec. |
| Measurement/illumination area | Reflectance: Changeable between LAV, MAV, and SAV
LAV: Ø25.4 mm / Ø30 mm
MAV: Ø8 mm / Ø11 mm
SAV: Ø4 mm / Ø7 mm
Transmittance: Approx. Ø24 mm |
| Repeatability | When white calibration plate is measured 30 times at 10-sec. intervals after white calibration has been performed:
Spectral reflectance: Standard deviation within 0.1%
Colorimetric values: Standard deviation within ΔE*ab 0.02 |
| Inter-Instrument Agreement | Mean ΔE*ab 0.15 (LAV/SCI) Average for 12 BCRA Series II color tiles compared to values measured with master body |
| UV adjustment | Instantaneous numerical adjustment |
| UV cut filters | 400 nm cutoff and 420 nm cutoff |
| Transmittance chamber | Width: 133 mm, Depth: Approx. 50 mm; Measurement diameter: Approx. 17 mm
Transmission sample holder (optional accessory): Sample holder for both plate-shaped and liquid samples (removable); Liquid samples not measurable with CM-3610A. |
| Interface | USB 1.1 |
| Power | AC 100 to 240V 50/60Hz (using included AC adapter) |
| Operating temperature / humidity range (*1) | 13 to 33°C, relative humidity 80% or less (at 35°C) with no condensation |
| Storage temperature/humidity range | 0 to 40°C, relative humidity 80% or less (at 35°C) with no condensation |
| Size (W×H×D) | CM-3600A: 244 × 205 × 378 mm
CM-3610A: 300 × 597 × 315 mm |
| Weight | CM-3600A: 11.5 kg
CM-3610A: 16.5 kg |
| Standard accessories | CM-3600A: White Calibration Plate, Target Mask (Ø4 mm), Target Mask (Ø8 mm), Target Mask (Ø25.4 mm), Zero Calibration Box, AC Adapter, Dust Cover, Accessory Case, USB Cable (3 m) CM-3610A: White Calibration Plate, Target Mask (Ø4 mm), Target Mask (Ø8 mm), Target Mask (Ø25.4 mm), Zero Calibration Box, AC Adapter, Dust Cover, Accessory Case, USB Cable (3 m) |
| Optional Accessories | CM-3600A: Color Data Software SpectraMagic™ NX, Transmittance Specimen Holder, Cell (2mm)/(10mm)/(20mm), Plastic Cell (2mm)/(10mm)/(20mm), Transmittance Zero Calibration Plate, USB Cable (5 m)
CM-3610A: Color Data Software SpectraMagic™ NX, Transmittance Specimen Holder, Transmittance Zero Calibration Plate, Opacity Jig, USB Cable (5m) |
Specifications are subject to change without notice.
Spectrophotometer CM-3600A
Catalog Download: Download PDF (2.8MB)
Owner’s Manual: Download PDF (1.4MB)
Case Study: Clemson University: Understanding and Controlling Color Download PDF (2MB)


