Vision Inspection Solution for Complete Backlit Components Inspection

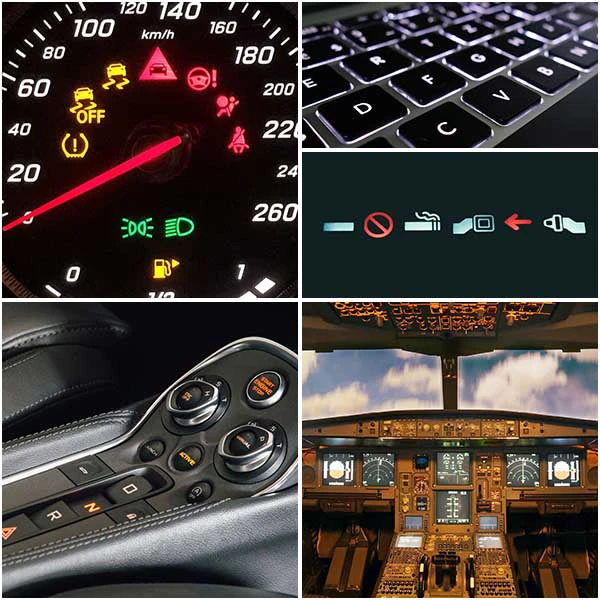
Traditional backlit components or indicators though gradually being replaced by newer technology such as OLED display panels and touchscreen interfaces are still widely used in automotive, electronic devices, aircraft cockpits, etc. Backlit components typically consist of a cut-out shaped plastic surface layer made by plasma or laser cutters and a light source (e.g., LEDs) behind the surface layer for illumination through the shape that was cut out. As these backlit components are typically used to convey safety and operational information, they must be inspected to ensure their visibility and that they are free from defects. In heavily regulated industries like automotive and aviation, the backlit components are subject to strict standards for brightness (luminance), color (chromaticity), and other characteristics.
Quality Issues with Backlit Components or Signs
Inspecting the backlit components or signs can be challenging as their quality is affected by a variety of factors, including the light source or the dimensional integrity of the surface layer. Often, quality issues arise from errors in the cut-out process, causing dimensional integrity issues like elements in the wrong orientation or location, misshapen elements (size, shape, etc.), missing or extra elements, etc. Other times, it might be due to incorrect luminance and chromaticity or non-uniformity illumination of the light source. The photometric systems (photometers, colorimeters, etc.) are great when it comes to measuring the luminance and chromaticity of backlit components. However, most of them lacked the registration function of machine vision that can register uniquely shaped elements or evaluate their dimensional integrity. Hence, the conventional way of inspecting backlit components would necessitate using multiple measurement systems or a complex customized measurement solution. For instance, a machine vision system is used to check for any form of defects, and a photometric system is used to evaluate the luminance and chromaticity of the backlit components separately.
Automated Visual Inspection Solution for Backlit Components
To address the need to improve backlit component inspection efficiency, Radiant Vision Systems offers a single visual inspection system that combines both photometric measurement and machine vision-based registration functionality through its ProMetric® Imaging Colorimeter/Photometer and Vision Inspection Pack (VIP™) software. This visual inspection system enables manufacturers to measure the luminance and chromaticity of backlit components while at the same time inspecting for any dimensional integrity issues.

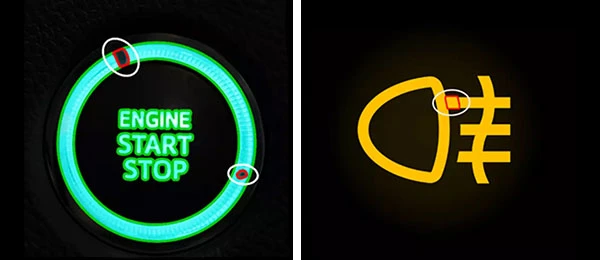
VIP Software can detect defects (e.g., exclusions, inclusions,etc.) in backlit components.
Image courtesy of Radiant Vision Systems, LLC.
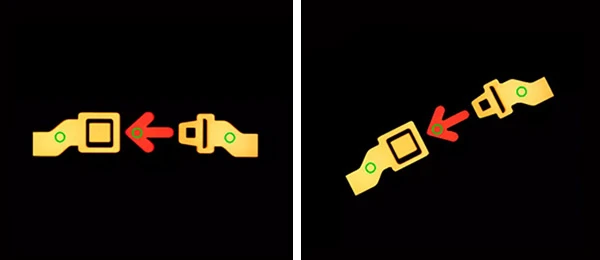
The VIP software allows fast registration of multiple elements on the backlit components captured within a single measurement image. Furthermore, it features a dynamic registration function whereby the elements can be measured based on the defined point of interest (POI) regardless of the component placement or system fixturing, simplifying the inspection process.

VIP software can automatically locate and registers the new backlit component element position and maintain the same POI position. Image courtesy of Radiant Vision Systems, LLC.
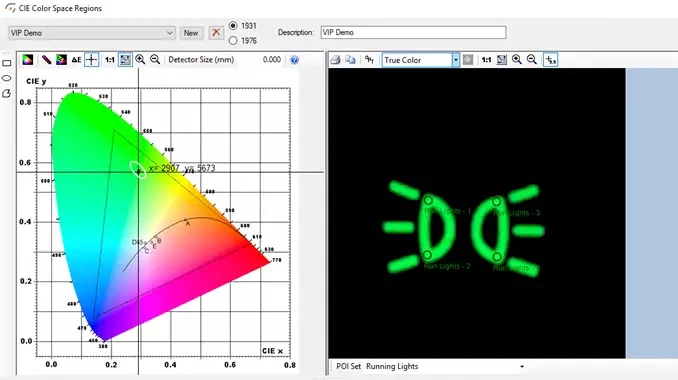
Pass/Fail tolerance for luminance and chromaticity can also be easily established for the whole region of interest (ROI). Pass/Fail tolerance can also be set based on the defined POI shown in the example below. Users can define the chromaticity tolerances on the CIE color space for the four POI on the side lights indicator element.

Setting the tolerances for pass/fail using chromaticity (xy) coordinates in the VIP software.
Image courtesy of Radiant Vision Systems, LLC.
Backlit components inspection is made easy with Radiant’s ProMetric® Imaging Colorimeter/Photometer and VIP software. Check out this on-demand webinar to learn more about their functions in greater detail.
Need help finding the right instruments or solutions for your applications? Get in touch with our Specialists for a free consultation now.
